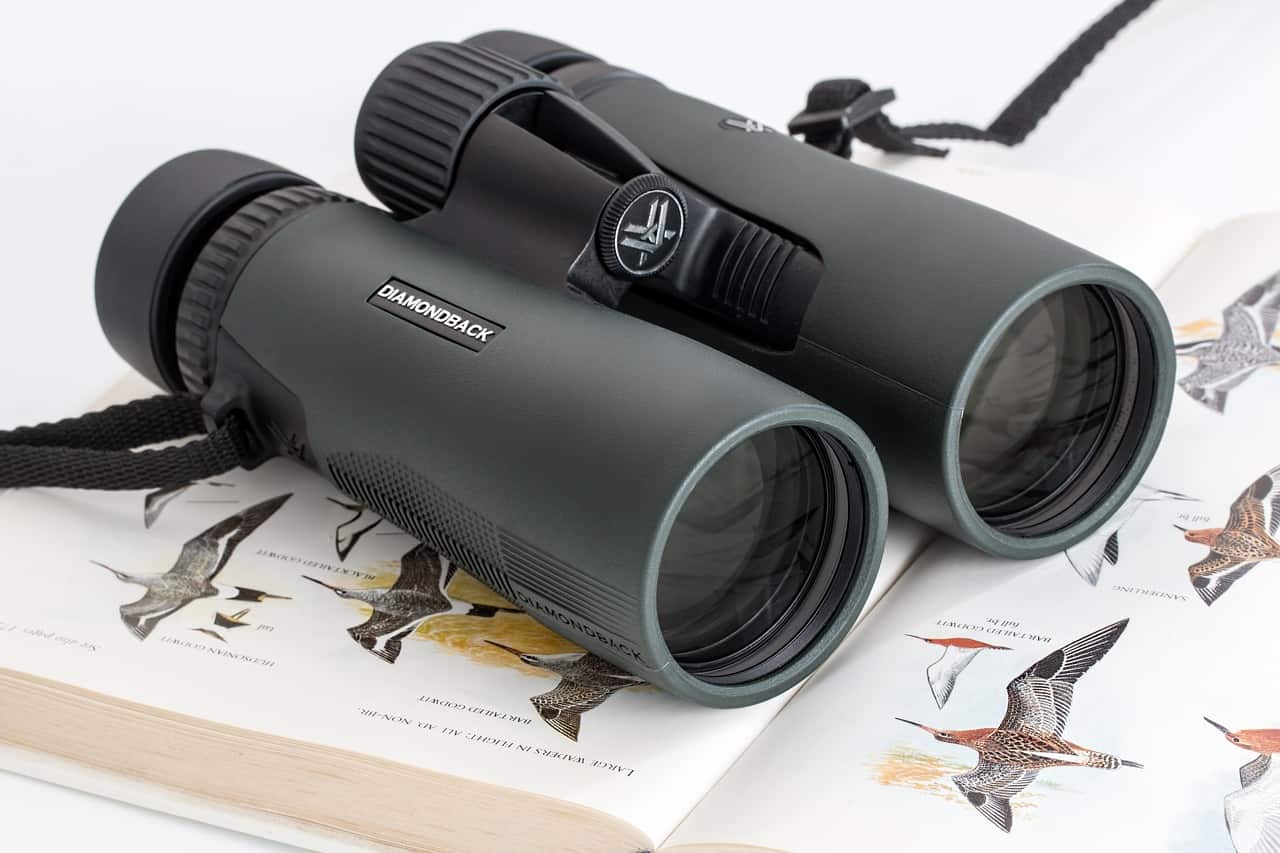
Are you a hunter, a nature lover, or possibly a sports fan? If you are any of them, then you must know the addiction of using binoculars. Aiming and focussing at far-off places give you a sense of control and this makes people love their binoculars.
However, certain harsh conditions i.e. falling, colliding, pressing can harm the delicate parts of your binoculars. Therefore it is a necessity for you to learn how to repair binoculars at home. I have extracted some very useful tips, methods, and precautions for you to keep your binos in a perfect state.
Maintaining, repairing and cleaning are the three ways that can keep your binoculars running for decades. As you invest a hefty amount in buying a pair, you should be concerned about keeping them unharmed. Also if there are minor accidents that affect your binoculars, don’t worry, because it doesn’t take much to fix these damages.
You just need to learn the things I will be sharing with you, and having read this Binocular Repair DIY guide you will say bye to that expensive optic repair shop forever!

Lenses, prisms and focus knobs are the three most important parts in binoculars that often get faulty when mishandled and you would want to repair them. So, let’s discuss how to repair binoculars at home.
How to Repair Binoculars at Home: Lens, Prisms, Focus Knob
#1 Fixing Lenses
The lenses are the most delicate and significant part of binoculars. Also, these are the most exposed ones. Whenever your binoculars fall or are hit by the sandstorm, lenses bear the most damage. To prevent your lenses from getting destroyed you should know about these precautionary measures first.
- Never keep your binoculars in damp places. The moisture present in the air starts getting trapped in and it promotes the growth of fungus. The fungus once grown will take a lot of your time and effort to be removed.
- Try to avoid getting your binoculars out when strong winds are blowing or heavy rain is falling. Like both of them, if hit directly the outer coating of your binoculars, will start scratching the outer colour coating of lenses. Once the colour coating is faded, you will have no option other than buying new ones.
- Don’t alter the settings of your lenses repeatedly. Although most people take care and do not open up their binoculars very often, there are some passionate or should I say fidgety people who like to see the whole working process. I would suggest you not to open the screws and remove the lenses especially if you are a newbie.
- Prevent mishandling. Extensive pressure exerted on lenses will move them away from the centre and you will have to relocate them in order to focus accurately.
- Never use your binoculars to look at the sun. As doing so will severely damage your eyes and the lenses simultaneously.
Want to fix binoculars at home, watch this detailed binocular repair video tutorial.
Be wise and patient while working on optics, they are as delicate as our own eyes. Having discussed some tips to protect your binocular lenses, here are the ways to repair them at home.
- If your lenses have moved away from their original spot and you are facing trouble during the focusing process, you can easily repair it at your home.
- First of all, gather the lens screwdriver you will be needing to open the tiny and nearly invisible screws.
- You can get these drivers from an optic repair shop (it is better if you buy a full set, you will be needing it in the future too) at very affordable prices.
- Other essentials you must have while operating on your lenses are repair manual of your binos, wiping cloth, soap solution, kitchen tissue roll, and a scale.
- Start the repairing process by locating lens screws. If they are covered under a rubber coating, use your manual and mark their position on a paper (it will help you to remember respective positions of the screws).
- Take the small screwdriver and open up lens screws. In most binocular pairs they are right at the top of both lenses. After removing them remove lenses too.
- Now before fixing lens position, it is necessary to clean them. It is better to use a professional cleaning kit or a dry piece of microfiber cloth. However, if your lenses are extremely dirty and dust is stuck on them, wash them gently in the soapy solution you have made.
- Clean the lenses and let them dry. In the meantime measure the central position of both lens cups. Once the lenses are dried up place them exactly at the centre point (which you marked with the scale).
- Placing lenses back in is very tricky, use tweezers to adjust their position (do not use finger it will leave fingerprints on them).
- Now, look through the lenses to check if they are in the exact place or not.
- Once you are done with tightening the screws, it is the time for the final test. Take the scale and measure the centre of two sides. If they are equidistant from both sides, your repairing process is a success.
- However even if there is a slight fault in their position, you can do the process again as you are familiar with the screws now.
Here is a thing to remember, you can only fix the position of lenses. If your binoculars have cracks or are broken, there is no way to fix them (even professionals can’t).
If you will follow the preventive measures I discussed earlier, you will not need any professional help to repair your binos. You will be doing this on your own.
#2 Fixing Prisms
Next most important thing in binoculars is their prisms. These prisms collimate the images coming from two sides and if they are perfectly aligned, our brain will receive one image. But if alignment in prisms is disturbed, our eyes will have to struggle in seeing one clear image.
The condition of seeing two images because of misalignment of prisms is called de-collimation. It happens mostly due to an internal fault in binos. We cannot prevent the misalignment, the only thing we can do is fix it.
Don’t bother, although repairing de-collimated binoculars is a bit tricky, it is not that difficult. All you need is to be patient and focused while repairing this dis-alignment.
- Start by collecting the essential equipment (as always).
- Binocular Repair Tools: Screwdrivers, scale, manual, cleaning cloth and tissue rolls etc. Note. Preferably you should have a binocular collimator instead of a screwdriver for collimation. However, a screwdriver will also fulfill the purpose. In the case of using a screwdriver, the process is called conditional alignment, not collimation.
- Additional Accessories Needed: A tripod stand and a target to check the accuracy of the repairing process while repairing the prisms.
- The target must be hung on a stable object i.e. tree or wall and it should be 100 meters away from you. The distance of target will depend upon the magnification power your binoculars offer. If your pair offers 10x then 100 meters, if magnifying power is 5x, a 50 meters distance will be fine.
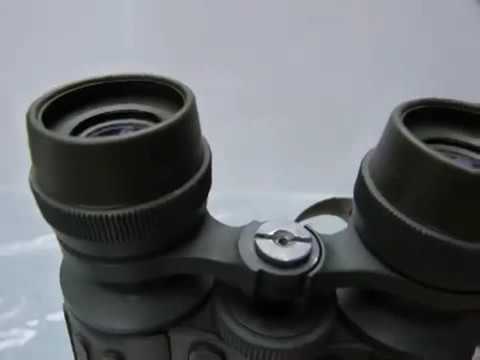
- The screws which control prisms are most of the time hidden under a covering and you will have to remove the covering. Take a penknife and peel down the covering to see the screws easily.
- Mostly there are 2 screws on each prims (4 in total), one is to increase zooming power and other is to align the path of light.
- Pinpoint the fault in prisms by aiming at your target (a wire, or a straight line). If the fault is present, you will see the target line on different heights through both sides.
- In case the target line seems lower through the right side, you will have to tighten up the screws in the right side.
- Pick the smallest screwdriver and start moving the screws on right monocular. After moving it a bit, test your target.
- If the line has moved upward a little, it means you are going well, keep it moving until the two lines merge.
- Similarly, if the target is significantly higher than usual, start loosening its screws until it merges with the other.
- If your binoculars are extremely de-collimated and both lenses show different imagery, you will have to depend upon your own eyes as a final result.
- Match the view from two sides with your own eyesight in this case.
If you are looking for a binocular repair manual and a perfect book to learn everything, I will highly recommend you choosing, using and repairing binoculars by J.W. Seyfried.
As I already said, de-collimation isn’t caused by mishandling or falling, it just happens due to excessive use and tilting away of screws with the passage of time. That is why you will have to keep checking if your pair is collimated or not.
The movement of the focus knob also causes slight movement of prism screws and the alignment of binoculars starts getting disturbed. If you find this whole process a bit bothersome, you should try to avoid excessive movement of knobs and screws.
#3 Fixing the Focusing Knob
Excessive use of the focus knob results in friction. If the grease (the lubricant used to ease the movement of screws) fades away with time, you will face trouble in focusing through your binoculars. This problem can be repaired very easily at home (in fact this is the easiest one).
Tools and Materials: To fix the focus knob
- Grease. There are many types of grease and most of them have a bad odor. You should opt for the colorless and odorless grease. This type is easily available at all optic stores and automobile workshops.
- Cotton Buds. To apply the grease and clean the knob thoroughly.
- Magnifying glass (it is optional) to check for small dust and rust particles.
Now let us begin the repairing:
Sometimes focus knobs stop moving freely and it starts producing sound when it moves. This shows a lack of lubrication.
- Step 1: Open your focusing knob, it generally has a large screw on top so you can easily remove it.
- Step 2: After opening, take the cotton bud and clean it from inside. You can use a blowing brush too.
- Step 3: Apply grease on a cotton bud and start applying it, be gentle and apply it thoroughly.
- Step 4: The extra amount of grease will make the screws slippery and you have to tighten them up from time to time.
- Step 5: Put the screws back, and yes! You are all done.
After fixing all the three parts, clean your binoculars. It’s time to test them!
Check the position of your lenses, aim at the target and make sure the binos are perfectly aligned. Move the focusing knob back and forth to ensure it is working fine.
Conclusion
This guide was to acquaint you with how to repair binoculars at home. And I am pretty much sure I have been successful in doing so.
You will not have to run to an optics store if you are seeing two objects through your binoculars when there is actually one, because now you can fix their alignment conveniently.
As I already explained broken and lost parts cannot be repaired at home, at those times you will require professional assistance in those cases. Here is our link to the nearest places you can go if you need a professional to fix your binoculars.

An optics enthusiast – I love bird watching as well as wildlife. Originally from South Africa, I moved to the UK at a young age. I love reviewing the latest binoculars as well as traveling. I work as a comms consultant during the day. My plan is to travel across the world so building up to that goal.


